

※本記事は2021年7月2日に更新しました。
「レイアウト作成してみたけどうまく位置が揃わない!」
本記事ではそんな声に対し、レイアウトを上手くそろえる方法を解説します。
今回の記事で解説する内容は以下の通りです。
- 文字と入力欄の下線をそろえるベースラインの使い方
- 任意の位置で文字の開始位置を揃えるガイドラインの使い方
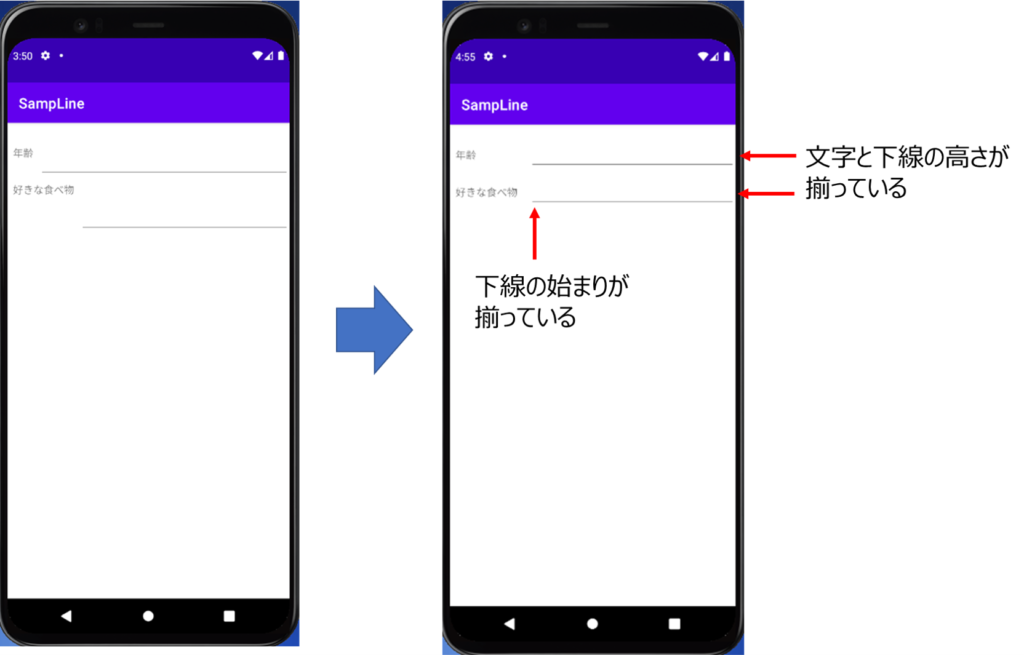
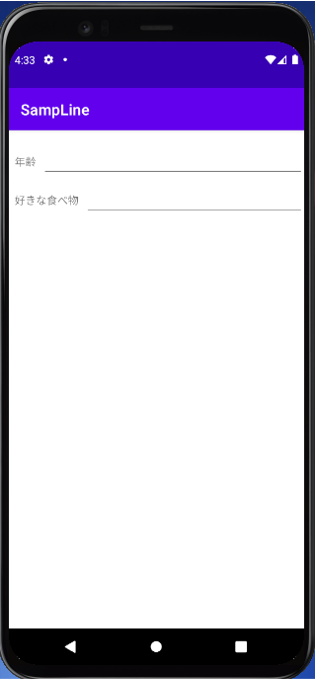
今回の内容で、以下の図のようにレイアウトを整えることができます。
前提として、本記事はAndroid Studio 4.2.1を対象に記載します。
また、筆者のAndroid Studioは日本語化しているため、日本語にて解説します。
では早速参りましょう!
前回記事はこちら

準備

2つのラインの説明用に、簡単なアプリを作成しました。
こちらを使って、ベースライン、ガイドラインの説明を行います。
以下の文字列リソースファイルstring.xml、
レイアウトファイルactivity_main.xmのコードをコピペしてください。
string.xml
<resources>
    <string name="app_name">SampLine</string>
    <string name="age">年齢</string>
    <string name="food">好きな食べ物</string>
</resources>
activity_main.xml
<?xml version="1.0" encoding="utf-8"?>
<androidx.constraintlayout.widget.ConstraintLayout xmlns:android="http://schemas.android.com/apk/res/android"
    xmlns:app="http://schemas.android.com/apk/res-auto"
    xmlns:tools="http://schemas.android.com/tools"
    android:layout_width="match_parent"
    android:layout_height="match_parent"
    tools:context=".MainActivity">

    <TextView
        android:id="@+id/textView"
        android:layout_width="wrap_content"
        android:layout_height="wrap_content"
        android:layout_marginStart="8dp"
        android:layout_marginTop="32dp"
        android:text="TextView"
        app:layout_constraintStart_toStartOf="parent"
        app:layout_constraintTop_toTopOf="parent" />

    <TextView
        android:id="@+id/textView2"
        android:layout_width="wrap_content"
        android:layout_height="wrap_content"
        android:layout_marginStart="8dp"
        android:layout_marginTop="32dp"
        android:text="TextView"
        app:layout_constraintStart_toStartOf="parent"
        app:layout_constraintTop_toBottomOf="@+id/textView" />

    <EditText
        android:id="@+id/editTextTextPersonName"
        android:layout_width="0dp"
        android:layout_height="wrap_content"
        android:layout_marginStart="8dp"
        android:layout_marginTop="32dp"
        android:ems="10"
        android:inputType="textPersonName"
        app:layout_constraintEnd_toEndOf="parent"
        app:layout_constraintStart_toEndOf="@+id/textView"
        app:layout_constraintTop_toTopOf="parent" />

    <EditText
        android:id="@+id/editTextTextPersonName2"
        android:layout_width="0dp"
        android:layout_height="wrap_content"
        android:layout_marginStart="8dp"
        android:layout_marginTop="32dp"
        android:ems="10"
        android:inputType="textPersonName"
        app:layout_constraintEnd_toEndOf="parent"
        app:layout_constraintStart_toEndOf="@+id/textView2"
        app:layout_constraintTop_toBottomOf="@+id/editTextTextPersonName" />
</androidx.constraintlayout.widget.ConstraintLayout>
ベースラインの使い方

ベースラインの使い方を解説します。
ベースラインとはテキスト下部の位置の線のことです。(下図参照)
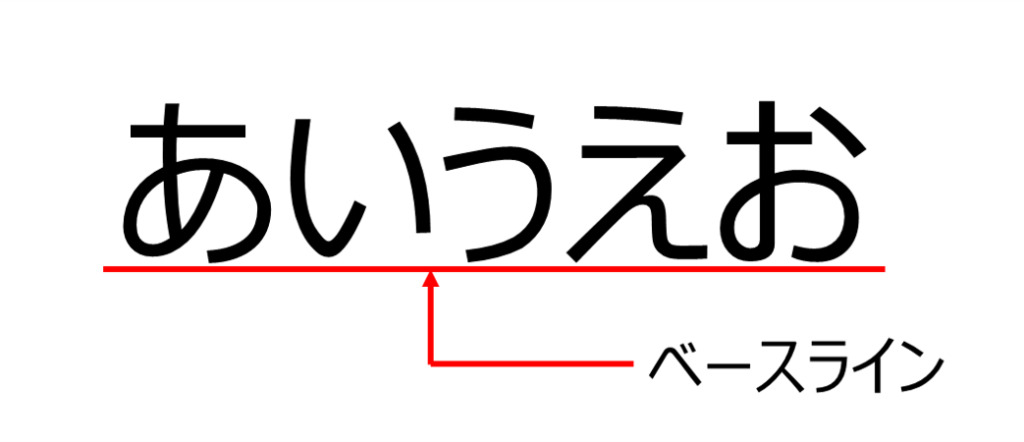
ベースラインを合わせることによって、
同じ線状で文字を配置することができます。
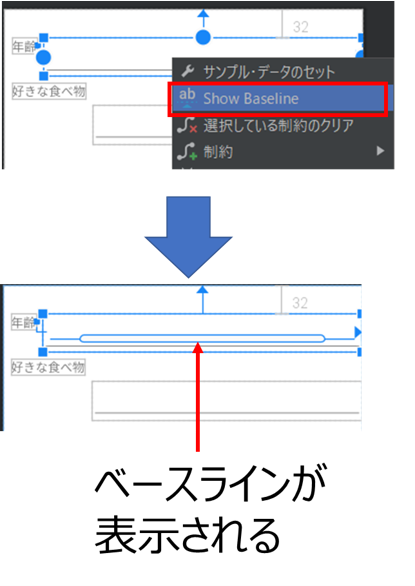
このベースライン、初期状態では表示されていません。
EditTextViewを右クリックし『Show Baseline』を選択します。
選択するとEditTextに太い下線が現れます。
これがベースラインです。(下図)
次に、ベースラインと隣のテキスト下の〇を結んでみましょう。
テキストと、EditTextが一列に並んだはずです。
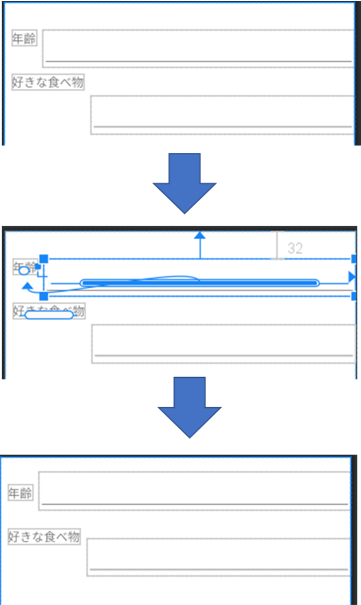
練習でもう一つのテキストもやってみてください。
最初より大分見やすくなるはずです。
ガイドラインの使い方
現状だと、『年齢』と『好きな食べ物』の文字数の違いのため、
EditTextの位置がずれていて見栄えが良くありません。
EditTextの位置を整えていきましょう。
使うのはガイドラインです。
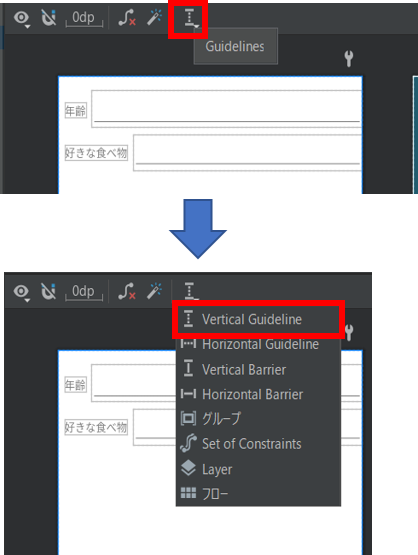
ガイドラインの設置は下記図のアイコンから行います。
今回は縦の位置を揃えたいので、Vertical Guidelineを使用します。(下図)
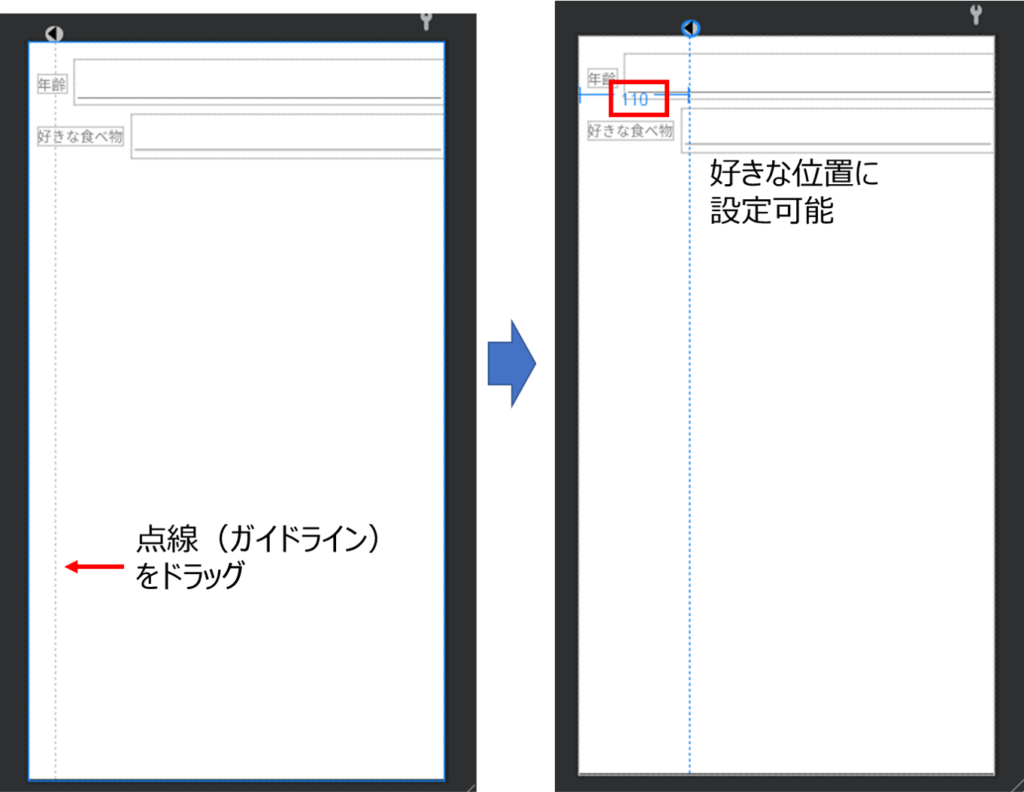
選択すると、点線のガイドラインがデザインエディタに表示されます。
デザインエディタ上では表示されていますが、
実際のスマホ画面には表示されない線です。
ガイドラインはドラッグ可能で、左右の好きな位置に配置することができます。
今回は左端から110dpのところに配置します。(下図参照)
EditTextの左端をガイドラインに合わせていきましょう。
下記図のように操作することで、EditTextとガイドラインが揃います。

下のEditTextにも同様のことを行えば完成です。
これで大分見た目がよくなりました。
最後に、このレイアウトファイルのコードを紹介します。
コードの中にBaseline、Guidlineがあるのを確認してください。
<?xml version="1.0" encoding="utf-8"?>
<androidx.constraintlayout.widget.ConstraintLayout xmlns:android="http://schemas.android.com/apk/res/android"
    xmlns:app="http://schemas.android.com/apk/res-auto"
    xmlns:tools="http://schemas.android.com/tools"
    android:layout_width="match_parent"
    android:layout_height="match_parent"
    tools:context=".MainActivity">

    <TextView
        android:id="@+id/textView"
        android:layout_width="wrap_content"
        android:layout_height="wrap_content"
        android:layout_marginStart="8dp"
        android:layout_marginTop="32dp"
        android:text="@string/age"
        app:layout_constraintStart_toStartOf="parent"
        app:layout_constraintTop_toTopOf="parent" />

    <TextView
        android:id="@+id/textView2"
        android:layout_width="wrap_content"
        android:layout_height="wrap_content"
        android:layout_marginStart="8dp"
        android:layout_marginTop="32dp"
        android:text="@string/food"
        app:layout_constraintStart_toStartOf="parent"
        app:layout_constraintTop_toBottomOf="@+id/textView" />

    <EditText
        android:id="@+id/editTextTextPersonName"
        android:layout_width="0dp"
        android:layout_height="wrap_content"
        android:ems="10"
        android:inputType="textPersonName"
        app:layout_constraintBaseline_toBaselineOf="@+id/textView"
        app:layout_constraintEnd_toEndOf="parent"
        app:layout_constraintStart_toStartOf="@+id/guideline2" />

    <EditText
        android:id="@+id/editTextTextPersonName2"
        android:layout_width="0dp"
        android:layout_height="wrap_content"
        android:ems="10"
        android:inputType="textPersonName"
        app:layout_constraintBaseline_toBaselineOf="@+id/textView2"
        app:layout_constraintEnd_toEndOf="parent"
        app:layout_constraintStart_toStartOf="@+id/guideline2" />

    <androidx.constraintlayout.widget.Guideline
        android:id="@+id/guideline2"
        android:layout_width="wrap_content"
        android:layout_height="wrap_content"
        android:orientation="vertical"
        app:layout_constraintGuide_begin="110dp" />
</androidx.constraintlayout.widget.ConstraintLayout>
今回のアプリはGitHubに公開しています。
下記URLの『SampleLine』です。
是非参考にしてください。
まとめ

今回はベースライン、ガイドラインの2つのラインを紹介し、
レイアウトの整え方を解説しました。
両方とも使いこなせば大きな武器となると思います。
ぜひ使ってみてください。
本記事が初心者の方の参考になれば幸いです。
次回の記事はこちら


コメント